It’s more than just learning the basics of the individual parts, though. My course will show you how to create a full fledged monitoring and alerting system, all from the open source Elastic components that make up the Elastic Stack. Each component works on Windows, Linux, or macOS so this course has something for everyone. Here’s a breakdown of what’s covered:
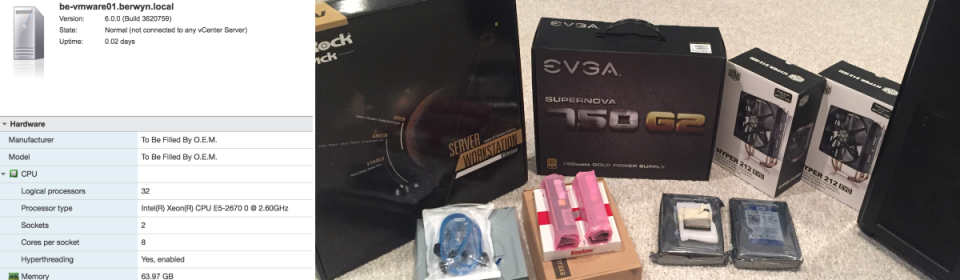
While working on my newest Pluralsight course this past Fall, I decided I wanted an easier way to create virtual machines on my local home network. Sure, it’s easy enough to spin up a few VMs on my iMac, but at some point the limitations of 16 gb of RAM and 4 processor cores was going to catch up with me. For this course in particular, I wanted to be able to run a half dozen or more VMs simultaneously to simulate a real corporate network with all or most components of the Elastic Stack running on it. What I really needed was a cheap virtual machine host with a lot of CPU cores and RAM and some reasonably fast disks. Before getting started on my course, I set out to build a server exclusively for the purpose of serving virtual machines on my network.
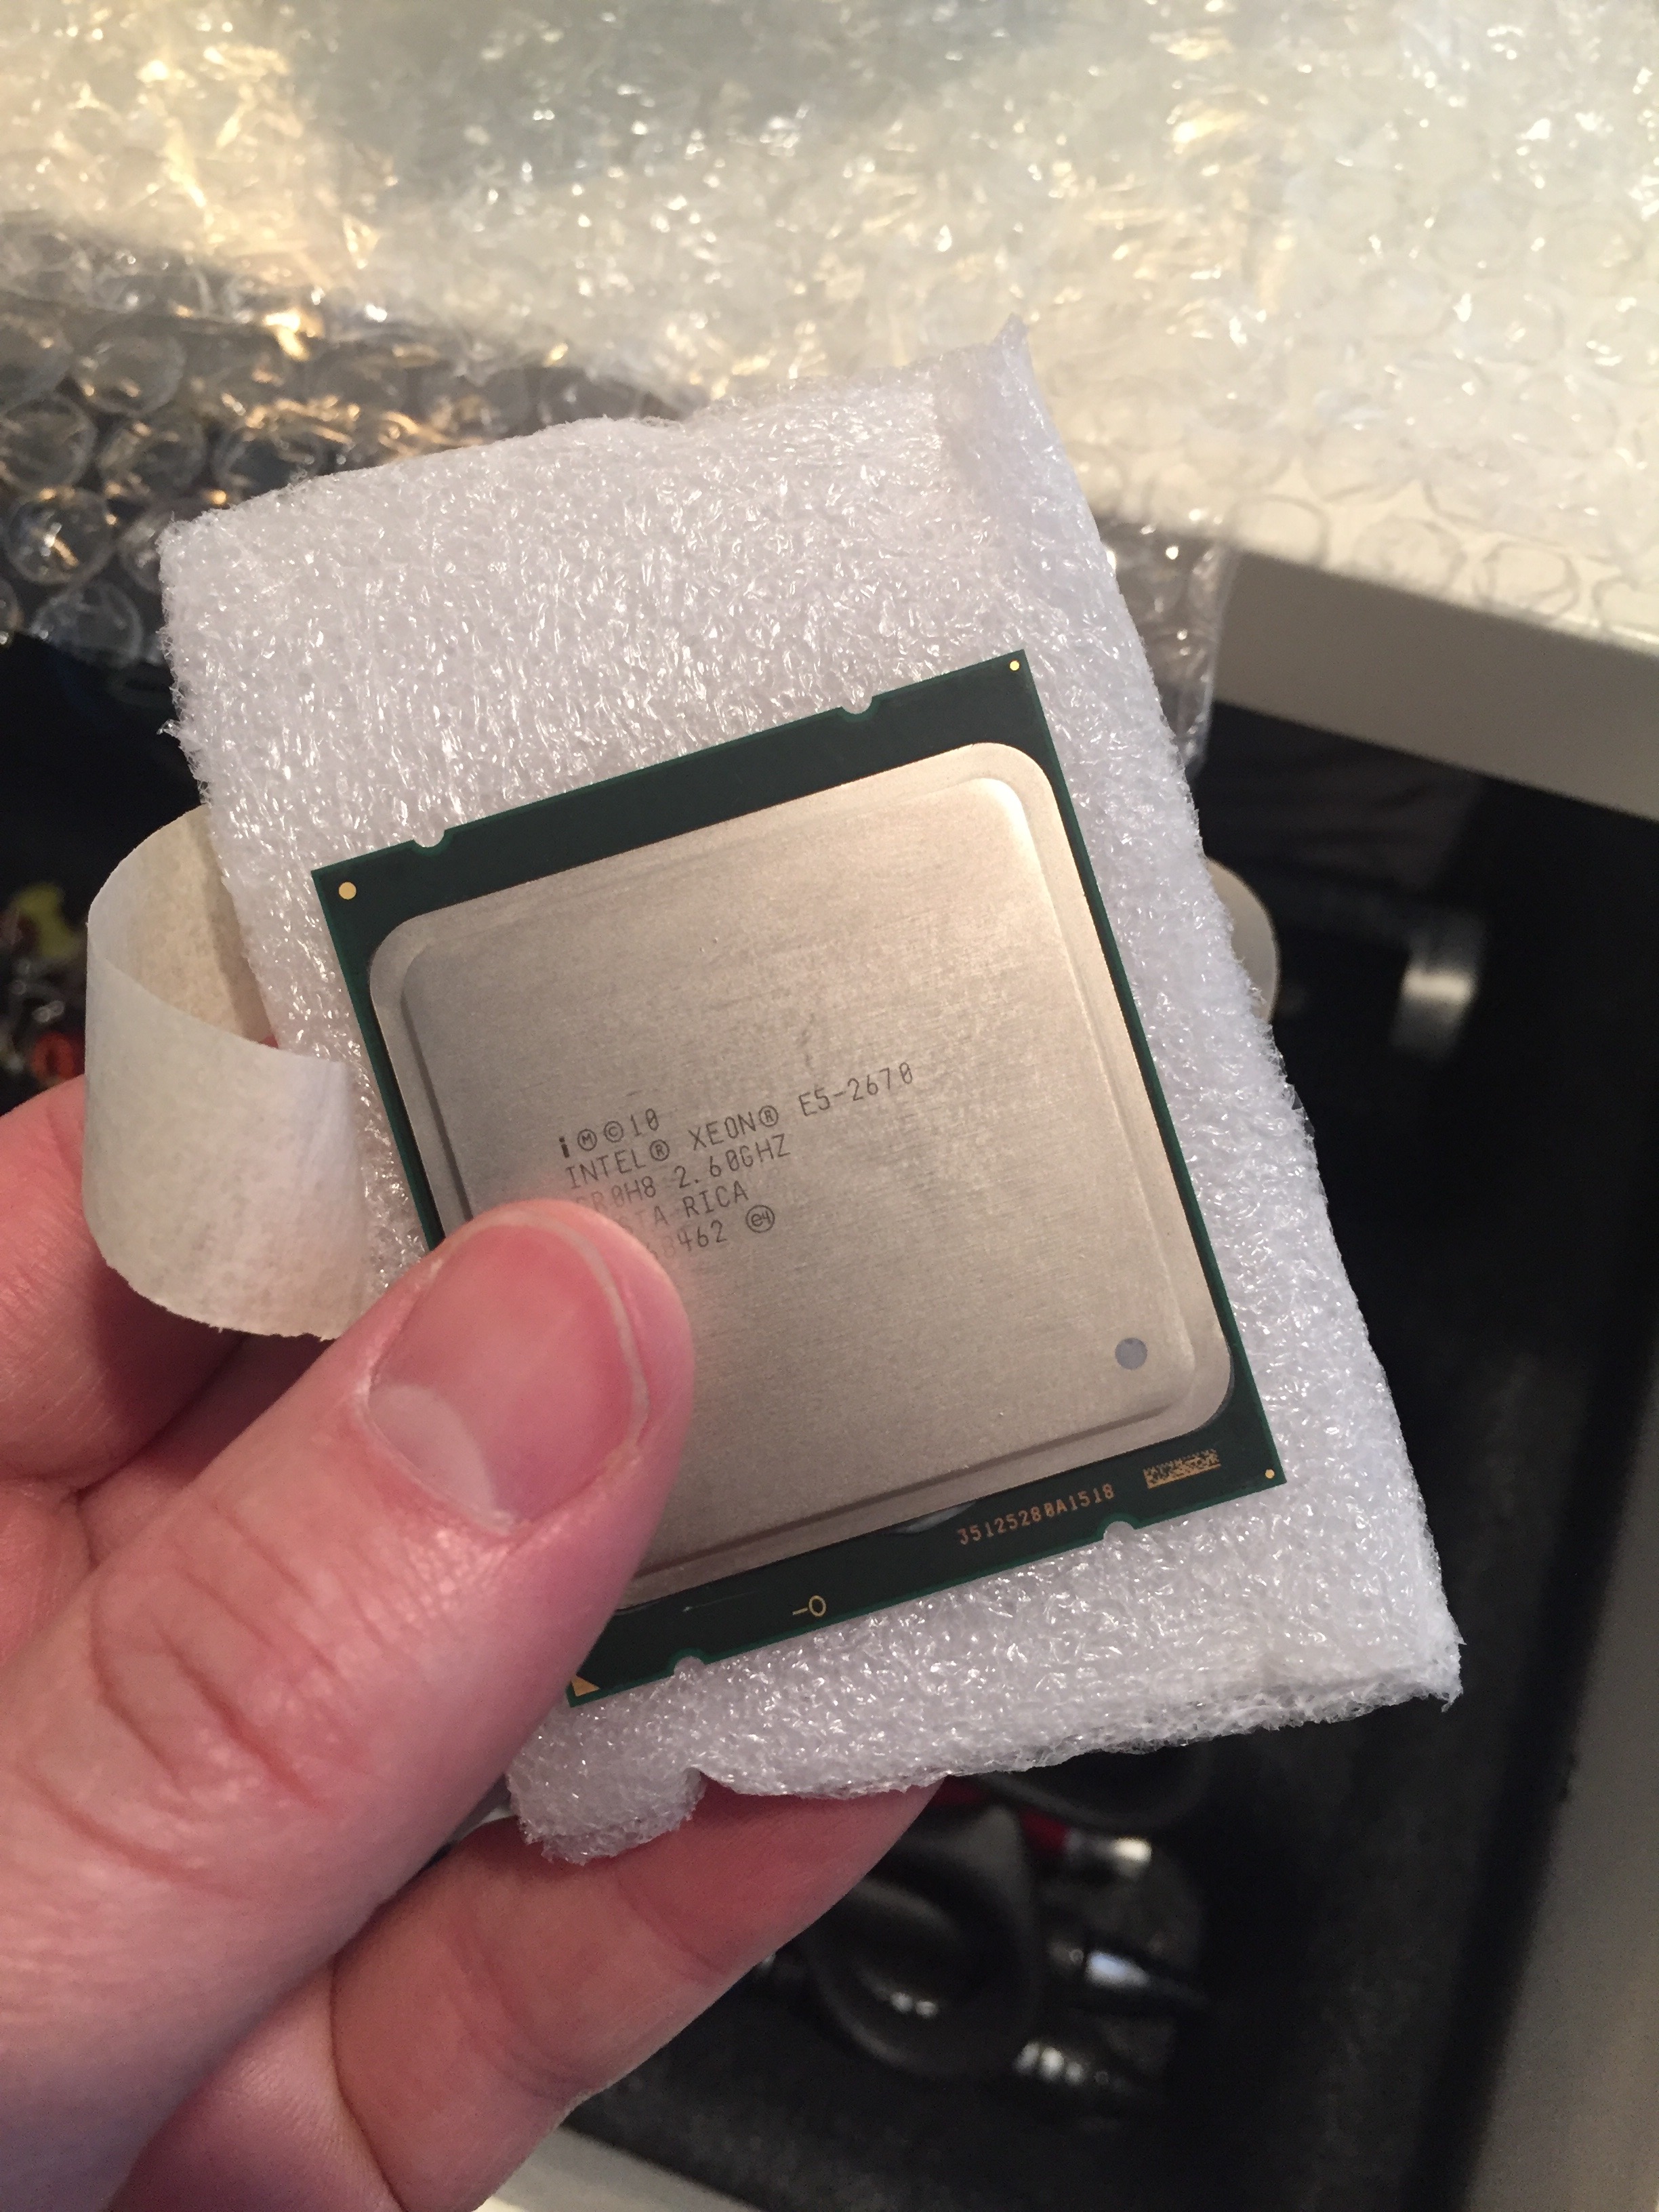
The centerpiece of the server build is the Intel Xeon E5-2670 CPU. The 2670 was released in 2012 with 8 cores (16 with Hyperthreading), and a full 20 mb L3 cache. By any measure it was a 64 bit x86 workhorse. Originally 2670s were priced at around $1,500 each which is far above the ~$1000 price tag I was hoping to keep the cost of this server under. As of this writing, however, you can find them on eBay for around $80. If you combine two of them, you end up with 32 logical cores which is an awful lot to spread around for virtual machines.
On Saturday, April 9th I gave a presentation for building your own AppHarbor-like git push deployment system for .NET projects. I tried to screen record as best I could. The audio came out quite good except that I didn’t repeat a few audience questions so you can only hear me answering some anonymous chatter. The screencast is presented below along with a zip file containing my step-by-step notes, my sample rakefile.rb build script, and my sample post-update hook for the git repo. Much thanks to Alex Hung for hosting the video for me!
If you use Microsoft Windows and you work in a shell or command prompt frequently then you probably have more than one shell window open at a time. On Microsoft Windows, I frequently have a regular cmd window, SSH Cygwin window, second cmd window for Git commands, and sometimes even a PowerShell window. This can get confusing pretty quickly which makes it difficult to alt-tab back and forth between the shell windows I’m looking for. You get a mess like:
They all look the same!
That’s a mess and it drives me crazy. One nice way to organize your shells, at least by group, is to color code them so they stand out better. For example, I use the following color scheme for my typical shell groups:
SSH: Green on black
Git: Purple on black
CMD: Yellow on black
PowerShell: Default white on blue
I also use custom sizes and font setups so I can get a little real estate onto my shell rather than the default Microsoft setup. The basic 80×25 default layout isn’t helping anybody!
Default Shell Layout. Yuk!
Here are some simple steps to customize the font for your shell and color code them in a way that makes it easy to navigate to:
1. Left click the little icon in the top left corner of window and click on the “Properties” menu item. You will get the “Command Prompt Properties window as illustrated below.
2. Beginning with the color tab, select the screen text and background you would like. I’m a sucker for the classic terminal black background so I usually sticky with it. Try the green or yellow colors because they stand out better against the black background.
Command Window Properties
3. Choose a layout that is suited for you. I’ve been using 90×40 lately so change the “Width” on the “Screen Buffer Size” and “Window Size” to 90 and the “Height” on the “Window Size” to 40. Leave the height on the “Screen Buffer Size” at 300. This dictates how much scrollable vertical area you can go back and review with the scrollbar on the right.
Choose Layout
4. The default font settings are a pretty chunky 8×12. Recent versions of Microsoft Windows have allowed for using True Type fonts. You can experiment with these a little to suit your needs. I use the Lucida Console font with a size of 12.
Font Settings
Tada! Look how nice that new shell looks! The font is smaller and nicer looking and you’ve got lots more real estate to issue and perform commands! Below is an example of my cmd, ssh, PowerShell, and Git shells all in one place but which are easily selectable because of the simple color coding:
Completed Shell
Try some experimentation with the fonts and colors to get a system that works for you. You’ll only have to configure the properties one time and will save LOADS of squinting while switching between windows!
Today my friend Sara Chipps and I are announcing the creation of the MVC Melee! The contest will be a 48 hour competition where teams of ASP.NET MVC developers will have 2 days to come up with a rad web application idea and put it in action. The public will judge. Prizes will be given. Bragging rights will be secured.
What the what?
MVC Melee is based on the Rails Rumble which has been going on for a couple years now. It’s a wonderful competition which has produced some amazing web sites. I tried last year to get a team together but couldn’t make it happen. After the rumble was over I wondered why we didn’t have a similar competition in the MVC space? Sara concurred and the MVC Melee was born! The Rails Rumble folks have been very supportive so far which has been great!
How’s it work?
The rules are pretty straight forward. We’ve launched an informational site with the details of the competition, FAQ, etc. Naturally there is a twitter account too. Teams should be 1 to 4 people and any resources you use for your site should be free. The constraints are very heavily based on the Rails Rumble rules but modified where applicable. This is our first time out so we have to be a little conservative about what’s allowed to be used. Future melees may be easier to open up to additional libraries such as home brew MVC frameworks.
Lets get it on!
We anticipate registration will open around May 1st so start thinking about web site ideas and team candidates! Aesthetics and usability are part of the judging criteria so think about having a designer on the team who can sling Photoshop and CSS like a ninja.
I’m REALLY looking forward to see what folks can come up with in 48 hours! Help us spread the word and join the melee!